Reading Notes For Writing Academic Research Manuscripts: A Multitool Method, The Research Life.
Annotate, summarize, process, and produce. This is my ideal workflow for going from reading articles to completing manuscripts. These steps get me to my first draft.

Reading is fundamental for developing new and interesting ideas. As a sleep researcher and writer, I read many research articles. This helps me to conceptualize novel research ideas and write academic journal articles (like this one).
For my academic research and other writing, producing some form of written information is normally my goal. When I write a manuscript, I spend a lot of time reading. Writing also involves exploring connections. For example, I consider how my previous research aligns with my current research questions and the broader sleep literature.
This exploration phase is one my favorite parts of academic research and writing. To make working with information easier (and more fun!), I use a few apps. My research workflow involves several steps that loosely follow this order: 1) annotate, 2) summarize, 3) process, and 4) produce. (1)
1. Annotate the research article
My first step for reading a research article is to annotate it. Annotation is about interacting with written work. When I annotate research articles, it is a messy, unstructured process. I underline sentences, draw lines near important sections, write notes in the margins, and draw models for key findings. Anything goes during my initial read and annotation.
I interact with the information by writing as I go and asking guiding questions about the studies. Given my research interests, some questions that I typically ask myself during reading are the following.
- What is the rationale for the study? Why did the researchers do this study?
- What are the independent and dependent variables? How is sleep measured? How is memory measured?
- Who are the people in the study (e.g., age, racial/ethnic diversity, education, recruitment strategy)?
- What is the study design?
- What were the research findings?
- What did the authors conclude? Are their conclusions reasonable?
These questions guide my annotations. I annotate research articles using the iPad app, Notability. My preference for Notability is largely because of the seamless scrolling option (i.e., minimal page breaks)(2). However, any app that has markup features will do. Or, you could opt for the simplest (and possibly messiest way) — going analog with printed articles. The general method for the annotation process is the same.
While my annotations are unstructured, I don’t markup everything. That wouldn’t be helpful for me to understand the article. When we prioritize all information, we are essentially prioritizing none of it (read more about this here). My guiding questions help me to prioritize the information that is most important.
2. Summarize the most important information of the article
After I’ve read over and annotated an article, I do a quick summary. The summary is guided by the questions that I ask myself during the read (listed above). I include a few notes at the top of the article to condense the information to the study sample, method, and major findings. Depending on the importance of the article, my summarization might stop here. If I am writing a manuscript and citing the article as a key motivator for my study, the article is further summarized into my Craft Docs folder for academic research articles.
In Craft Docs, I use a template that includes basic information about the article, such as the title, the date that I read it, and the year that it was published. It also includes a typed version of my initial, handwritten summarization (sample, method, results, general conclusions). I include a section for other notes that don’t fit into these categories that might be relevant for later (see image below; template linked here).
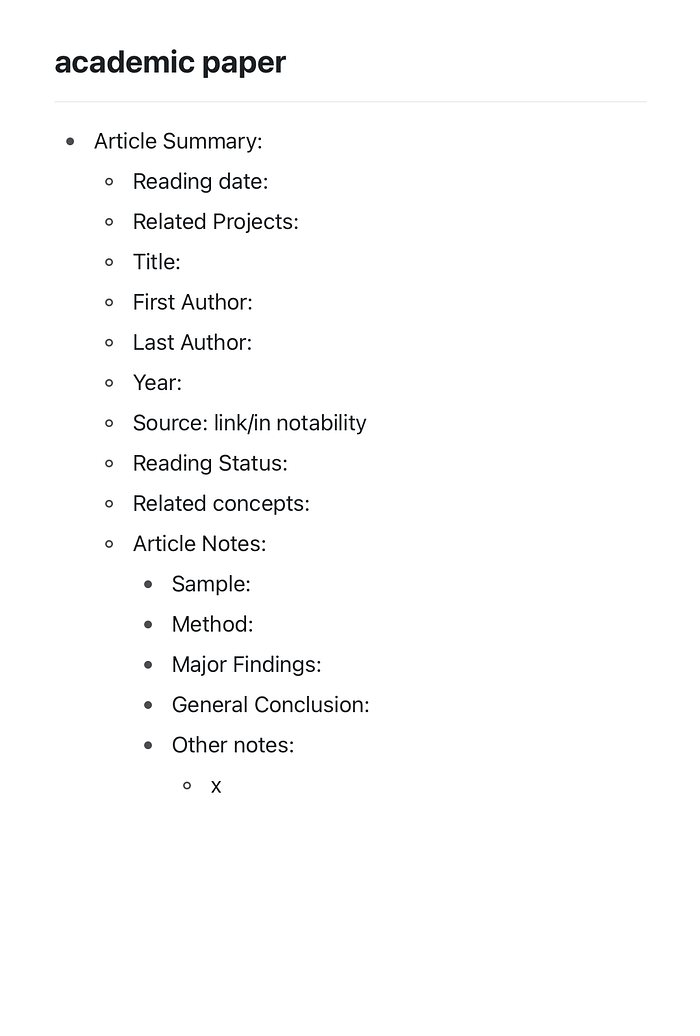
I sometimes include images of key figures or tables within the summary in Craft Docs. The benefit of this summarization is to not feel the need to revisit the original article when writing about it in a research manuscript, grant proposal, or any other document. If I do revisit the original article, the annotations allow me to quickly find the most important information.
3. Process and connect ideas with backlinks and boarding
One of my favorite parts of reading academic research papers is “playing” with ideas through deep thinking, processing, and connecting. Fully understanding research papers often means thinking about what previous studies are missing and how future studies can build off of the gaps of any one study. This requires connecting ideas. For example, we may know more about total sleep deprivation and its neural consequences in animal models as compared to humans. We can use what we know about sleep deprivation from animal models to design ethically appropriate and novel studies in humans (e.g., experimental sleep deprivation for short time periods, natural experiments or studying those who are sleep deprived with no experimental intervention as compared to those who are well-rested).
Ideas from reading can be processed and then linked to make connecting ideas feel effortless (and fun!). During my undergraduate and graduate studies, I would print out several research papers and spread them out on my desk as I read them. My Master’s thesis topic was developed by reading, annotating, and connecting several research papers spread on a table.
Considering the hundreds of articles that I reference as my academic career progresses, I’ve decided to avoid the mess of printing out papers. Now, I use note-taking apps that facilitate a similar “spreading out” and making room for finding connections between research articles.
One text-based way to do this is with backlinks. My app of choice for text-based notes is Craft Docs. In my Craft Docs template, I have a couple of sections that start with the word “Related.” Using these sections, I connect related projects and related concepts or other articles to the article that I am summarizing and processing.
These backlinks let me quickly see the summary for other articles that I connected the present one to. They also show a list of backlinks for any articles (or projects) that have been connected to the present article. This linking process helps me to remember other articles that are relevant to the present one within my notes.
For a messier, and arguably more natural, way to “spread” research articles out and connect ideas, I use the Muse app (see a YouTube video about Muse here). Muse helps me to connect ideas visually with a spatial canvas. In Muse, PDFs are added as card previews. These previews can be “cut out” as excerpts. Then, they can be grouped into boards, moved around, drawn on, and highlighted (see an example board below).

Using Muse is akin to writing on a whiteboard, but somehow better. I call the process of working with cards in the Muse app “boarding.” It involves pushing around ideas, drawing connections, taking excerpts of texts, figures, and tables, to develop new ideas.
Muse isn’t the only platform for boarding. There are other apps on the market for mind mapping and handwritten annotations, including Walling, Liquid Text, Margin Note, and Defter Notes. However, my experience with all of these apps has been subpar.
Notably, boarding doesn’t have to be digital. It can be done with a physical board, notebook, or index cards. However, to avoid the mess, I often use digital platforms like Muse. I am partial to digital boarding, largely because digital note-taking makes it easy to produce digital documents (e.g., research manuscripts, presentations, grant proposals). It also uses less physical space.
4. Produce a unique creation using connections
The final step is all about creativity. One outcome of reading academic papers is to create unique work from them. For my work, this commonly involves drafting a new research manuscript.
Admittedly, I wrote a lot of my dissertation thesis in Roam Research, but I’ve since transitioned to Craft Docs. As compared to Roam Research, I find Craft Docs simple to use and aesthetically pleasing with little to no effort on my part. (3)
A key feature that Roam Research and Craft Docs have in common is idea connection via backlinks. The power of backlinks lies in being able to have a visual representation of which articles and concepts are related to each other. In Craft Docs, each backlink allows for a quick glance or preview of your summarized information. It also lets users see a list of what other documents are connected to the current document (example below). I think of these links as reminders of what papers have similar concepts, which concepts are linked with which papers, and how my drafts of research manuscripts in Craft Docs integrate with my notes. (4)
A research manuscript is just one way of many that we can produce something from the research articles that we read. The output of the reading could be an email explanation, a journal article presentation, interview preparation for a summer internship or faculty position, or a grant proposal draft.
For example, when writing a grant proposal, I have to think about how my past research informs my planned research. I explain how my previous research findings motivate the proposed study and how my research experience (and that of my research mentors/team) will support the success of my planned project. Moreover, my planned research needs to be novel and push the field forward. It should add new, interesting, and meaningful information to the literature. Using my academic reading workflow, I look for gaps within the sleep literature that my proposed work can address. This process has helped me to secure several funded grants.
So where do academic papers go?: A quick note on storage
I save a lot of research papers. The PDFs can’t all be added to Craft Docs. It just isn’t structured for that purpose. Over the years, I’ve realized that there is no need for me to separate research papers by project or topic. Most papers that I read involve sleep, and I save all PDFs to a central folder called “all papers.”
I keep all citations and information for research articles within a dedicated citation manager. My favorite citation manager is Zotero. Other common citation managers include, Mendeley , Endnote, and Papers. Each of these has their advantages and disadvantages, but I have chosen to use Zotero over all of these for a few reasons.
- Zotero is free.
- Zotero is simple to use.
- Zotero is easily integrated with Safari and Google Docs (which means that you can collaborate with others without ruining their citations or asking one person to do all of the citing).(5)
Zotero is similar to what Shu Omi, note-taking and productivity YouTuber, might call “ idea storage.” I use Zotero to automatically populate information for nearly every research manuscript that I’ve ever referenced and everything that I’ve cited. If I’m interested in all of the research that I’ve seen on sleep quality, I can simply type in sleep quality and get a list of the research articles that mention sleep quality.
But can’t I just type in “sleep quality” on google scholar or pubmed and see what’s out there? Sure, but it wouldn’t give me a list of the articles that I have already referenced as compared to all of the articles on sleep quality that have been published. Memory, in general, is fallible. And my memory, in particular, isn’t that great.
I reference a lot of papers, and I don’t remember a lot of them. If I’ve already read a paper, it’s saved in Zotero. It’s likely that I have annotated it in Notability, and if it’s really important, I’ve summarized and processed it in Craft Docs and linked it to other important documents. Zotero, then, is where papers get saved; Notability is where they get annotated; and Craft is where things gets done (i.e., summarized, processed, produced).
This is one reading workflow among many others
My academic research process for reading and writing involves four basic steps: 1) Annotate, 2) Summarize, 3) Process, and 4) Produce. Although I enjoy this workflow, please keep in mind that this is just one idea about reading academic research papers. It is most certainly not the only workflow to meaningfully process and organize information (e.g., check out some of the inspiration for my note-taking workflows, including YouTuber Shu Omi and writers Anne Laure Le Cunff, Austin Kleon, and Cal Newport).
As with any other area of my work life, my reading process constantly evolves as the needs for my work change. For now, this structure is helpful for me. I am fortunate to have a job that allows me to play with apps and ideas, which contributes to the fun that I have with my research.
I’d love to hear about your reading process and how it facilitates creative output. What’s your reading workflow? What are some tools that you use to facilitate your understanding, and importantly, make the process fun?
If you found value in this post and want to say thanks, here are a few ways to support the blog:
- Leave a comment for further discussion.
- Chat with me directly and send feedback, questions, or article requests to emily.c.hokett@gmail.com
- Join Medium and my email list for regular posts (~2x per month, never spam, no ads).
- Buy me a tea🍵 to support the maintenance of the blog.
Notes
- This workflow (annotate, summarize, process, and produce ideas) is the ideal scenario for my most important projects. Depending on my available time and interest level in a project, I don’t always follow this order. For example, I might write a research proposal only using annotations in Notability and a sketch in Craft Docs if either time or interest is low. However, this is the system that I follow for my most important projects.
- There are many YouTube videos and articles that detail the differences between Notability and Goodnotes. Googling “Notability vs Goodnotes” or “handwritten notes for iPad” will result in several options.
- I find no need to endlessly tinker with settings in Craft Docs. This was not the case with Roam Research. I spent an embarrassing amount of time playing with custom CSS to get the “perfect” setup for my notes.
- In my workflow, Craft Docs acts as a note-taking app, not a word processor. I start early, initial drafts in Craft Docs. Given the rigid citing structure and page length requirements for most academic journals, it is impractical to try to write full research manuscripts in Craft Docs (as of the posting date of this article).
- I haven’t gotten the chance to try out sharing citation libraries on Zotero to make citations across collaborators easier, but it’s on my list!
Originally published at https://www.emilyhokett.blog on June 26, 2022.